> For the complete documentation index, see [llms.txt](https://darren.gitbook.io/project/llms.txt). Markdown versions of documentation pages are available by appending `.md` to page URLs; this page is available as [Markdown](https://darren.gitbook.io/project/devops/etcd/etcd-pei-zhi.md).
# Etcd配置
## 内容简介
* 1.etcd的安装
* 2.搭建单机版
* 3.搭建集群版
* 4.使用监听功能watch(服务发现)
* 5.使用rest api
* 6.搭建WEB界面并使用
## 一.安装
1.1 yum安装
`yum install etcd`
`若使用yum安装,默认etcd命令将在/usr/bin目录下,注意修改下面的etcd.service文件中的启动命令地址为/usr/bin/etcd`
1.2 二进制安装
#### 下载地址:
```
mkdir -p /home/app/etcd/
cd !$
# 下载
wget https://github.com/etcd-io/etcd/releases/download/v3.3.12/etcd-v3.3.12-linux-amd64.tar.gz
# 解压安装
tar zxvf etcd-v3.3.12-linux-amd64.tar.gz
cd etcd-v3.3.12-linux-amd64
## 将启动文件和命令管理文件拷贝到 PATH找到的路径中
cp etcd /usr/local/bin
cp etcdctl /usr/local/bin
mkdir /var/lib/etcd #etcd的数据目录
mkdir /etc/etcd #etcd的配置文件目录
```
#### 启动参数解释
```
--name
etcd集群中的节点名,这里可以随意,可区分且不重复就行
--listen-peer-urls
监听的用于节点之间通信的url,可监听多个,集群内部将通过这些url进行数据交互(如选举,数据同步等)
--initial-advertise-peer-urls
建议用于节点之间通信的url,节点间将以该值进行通信。
--listen-client-urls
监听的用于客户端通信的url,同样可以监听多个。
--advertise-client-urls
建议使用的客户端通信url,该值用于etcd代理或etcd成员与etcd节点通信。
--initial-cluster-token etcd-cluster-1
节点的token值,设置该值后集群将生成唯一id,并为每个节点也生成唯一id,当使用相同配置文件再启动一个集群时,只要该token值不一样,etcd集群就不会相互影响。
--initial-cluster
也就是集群中所有的initial-advertise-peer-urls 的合集
--initial-cluster-state new
新建集群的标志
```
## 二.搭建单机版
直接启动(不推荐)
```
etcd
```
etcd默认监听的是localhost的2379端口,既只监听了lo设备,这样会导致启动后集群中的其他机器无法访问\
因此我们可以在启动的时候将默认的localhost改成0.0.0.0,确保etcd监听了所有网卡。
以上方式并不推荐使用
请使用以下方式
#### 通过 systemd unit 启动文件来启动
### 1.环境变量配置文件/etc/etcd/etcd.conf
```
# [member]
ETCD_NAME=infra1
ETCD_DATA_DIR="/var/lib/etcd"
ETCD_LISTEN_PEER_URLS="https://172.20.0.113:2380"
ETCD_LISTEN_CLIENT_URLS="https://172.20.0.113:2379"
#[cluster]
ETCD_INITIAL_ADVERTISE_PEER_URLS="https://172.20.0.113:2380"
ETCD_INITIAL_CLUSTER_TOKEN="etcd-cluster"
ETCD_ADVERTISE_CLIENT_URLS="https://172.20.0.113:2379"
这是172.20.0.113节点的配置,果然高可用,其他两个etcd节点只要将上面的IP地址改成相应节点的IP地址即可。ETCD_NAME换成对应节点的infra1/2/3
```
#### 注意:etcd有要求,如果--listen-client-urls被设置了,那么就必须同时设置--advertise-client-urls,所以即使设置和默认相同,也必须显式设置
### 2.创建 etcd 的 systemd unit 启动文件:
在/usr/lib/systemd/system/目录下创建文件etcd.service,内容如下。注意替换IP地址为你自己的etcd集群的主机IP
```
Unit]
Description=Etcd Server
After=network.target
After=network-online.target
Wants=network-online.target
Documentation=https://github.com/coreos
[Service]
Type=notify
WorkingDirectory=/var/lib/etcd/
EnvironmentFile=-/etc/etcd/etcd.conf
ExecStart=/usr/local/bin/etcd \
--name ${ETCD_NAME} \
---中间这部分不需要证书去掉---
--cert-file=/etc/kubernetes/ssl/kubernetes.pem \
--key-file=/etc/kubernetes/ssl/kubernetes-key.pem \
--peer-cert-file=/etc/kubernetes/ssl/kubernetes.pem \
--peer-key-file=/etc/kubernetes/ssl/kubernetes-key.pem \
--trusted-ca-file=/etc/kubernetes/ssl/ca.pem \
--peer-trusted-ca-file=/etc/kubernetes/ssl/ca.pem \
---中间这部分不需要证书去掉---
--initial-advertise-peer-urls ${ETCD_INITIAL_ADVERTISE_PEER_URLS} \
--listen-peer-urls ${ETCD_LISTEN_PEER_URLS} \
--listen-client-urls ${ETCD_LISTEN_CLIENT_URLS},http://127.0.0.1:2379 \
--advertise-client-urls ${ETCD_ADVERTISE_CLIENT_URLS} \
--initial-cluster-token ${ETCD_INITIAL_CLUSTER_TOKEN} \
--initial-cluster infra1=http://192.168.73.61:2380,infra2=http://192.168.73.62:2380,infra3=http://192.168.73.63:2380 \
--initial-cluster-state new \
--data-dir=${ETCD_DATA_DIR}
Restart=on-failure
RestartSec=5
LimitNOFILE=65536
[Install]
WantedBy=multi-user.target
```
说明:
* 指定 etcd 的工作目录为 /var/lib/etcd,数据目录为 /var/lib/etcd,需在启动服务前创建这个目录,否则启动服务的时候会报错“Failed at step CHDIR spawning /usr/bin/etcd: No such file or directory”;
* 为了保证通信安全,需要指定 etcd 的公私钥(cert-file和key-file)、Peers 通信的公私钥和 CA 证书(peer-cert-file、peer-key-file、peer-trusted-ca-file)、客户端的CA证书(trusted-ca-file);
* 创建 kubernetes.pem 证书时使用的 kubernetes-csr.json 文件的 hosts 字段包含所有 etcd 节点的IP,否则证书校验会出错;
* \--initial-cluster-state 值为 new 时,--name 的参数值必须位于 --initial-cluster 列表中;
* 由于并没有配置TSL认证,所以都是http而不是https,etcd客户端监听在2379,服务端监听在2380
### 3.启动etcd及检查
```
1、启动:
systemctl daemon-reload
systemctl enable etcd
systemctl start etcd
systemctl status etcd
2、检查:
$ etcdctl --ca-file=/etc/kubernetes/ssl/ca.pem --cert-file=/etc/kubernetes/ssl/kubernetes.pem --key-file=/etc/kubernetes/ssl/kubernetes-key.pem cluster-health
任意节点执行就行
[root@docker ~]# etcdctl member list
192d36c71643c39d: name=node2 peerURLs=http://192.168.101.19:2380 clientURLs=http://192.168.101.19:2379 isLeader=false
5f3835545a5f41e4: name=master peerURLs=http://192.168.101.14:2380 clientURLs=http://192.168.101.14:2379 isLeader=true
77c1ac60c5100363: name=node1 peerURLs=http://192.168.101.15:2380 clientURLs=http://192.168.101.15:2379 isLeader=false
可以看见集群中自动推选了一个节点作为leader,然后查看集群健康状态:
[root@docker ~]# etcdctl cluster-health
member 192d36c71643c39d is healthy: got healthy result from http://192.168.101.19:2379
member 5f3835545a5f41e4 is healthy: got healthy result from http://192.168.101.14:2379
member 77c1ac60c5100363 is healthy: got healthy result from http://192.168.101.15:2379
cluster is healthy
结果最后一行为 cluster is healthy 时表示集群服务正常
使用etcd进行操作数据:
[root@docker ~]# etcdctl set name wadeson
wadeson
在node1、node2节点上进行查看:
[root@localhost ~]# etcdctl get name
wadeson
```
注意:如果日志中出现连接异常信息,请确认所有节点防火墙是否开放2379,2380端口。
以centos7为例:
```
firewall-cmd --zone=public --add-port=2380/tcp --permanent
firewall-cmd --zone=public --add-port=2379/tcp --permanent
firewall-cmd --reload
```
我们来使用curl来测试一下,是否可以远程访问,这里我的机器IP是10.211.55.25
```
➜ ~ curl -L http://10.211.55.25:2379/version
{"etcdserver":"3.3.12","etcdcluster":"3.3.0"}
```
如果不想使用2379和2380端口,也可以
```
#etcd 启动 指定端口2280 2279
/usr/local/bin/etcd \
--data-dir=/etcd-data --name node1 \
--initial-advertise-peer-urls http://0.0.0.0:2280 --listen-peer-urls http://0.0.0.0:2280 \
--advertise-client-urls http://0.0.0.0:2279 --listen-client-urls http://0.0.0.0:2279 \
--initial-cluster node1=http://0.0.0.0:2280
#连接
etcdctl --endpoints=http://127.0.0.1:2279 set cqh chenqionghe
etcdctl --endpoints=http://127.0.0.1:2279 get cqh
```
当然,我们也可以通过docker运行,这里给出启动脚本
```
#!/usr/bin/env bash
ETCD_NAME="etcd"
ETCD_VERSION="v3.3.1"
ETCD_PORT_CLIENT=2379
ETCD_PORT_NODE=2380
docker run -d \
-p ${ETCD_PORT_CLIENT}:2379 \
-p ${ETCD_PORT_NODE}:2380 \
--name ${ETCD_NAME} quay.io/coreos/etcd:${ETCD_VERSION} \
/usr/local/bin/etcd \
--data-dir=/etcd-data --name node1 \
--initial-advertise-peer-urls http://0.0.0.0:2380 --listen-peer-urls http://0.0.0.0:2380 \
--advertise-client-urls http://0.0.0.0:2379 --listen-client-urls http://0.0.0.0:2379 \
--initial-cluster node1=http://0.0.0.0:2380
```
## 三.搭建集群版
Etcd构建自身高可用集群主要有三种形式:
* 静态发现: 预先已知 Etcd 集群中有哪些节点,在启动时直接指定好Etcd的各个node节点地址
* Etcd动态发现: 通过已有的Etcd集群作为数据交互点,然后在扩展新的集群时实现通过已有集群进行服务发现的机制
* DNS动态发现: 通过DNS查询方式获取其他节点地址信息
这里我们采用Static方式,准备三台机器,ip如下(都已经安装etcd)
```
node1 192.168.73.61
node2 192.168.73.62
node3 192.168.73.63
```
#### 进入node1,创建并运行run.sh,脚本内容如下
```
编写etcd的配置文件/etc/etcd/etcd.conf
# [member]
ETCD_NAME=infra1
ETCD_DATA_DIR="/var/lib/etcd"
ETCD_LISTEN_PEER_URLS="https://192.168.73.61:2380"
ETCD_LISTEN_CLIENT_URLS="https://192.168.73.61:2379"
#[cluster]
ETCD_INITIAL_ADVERTISE_PEER_URLS="https://192.168.73.61:2380"
ETCD_INITIAL_CLUSTER_TOKEN="etcd-cluster"
ETCD_ADVERTISE_CLIENT_URLS="https://192.168.73.61:2379"
创建 etcd 的 systemd unit 文件
在/usr/lib/systemd/system/目录下创建文件etcd.service,内容如下。注意替换IP地址为你自己的etcd集群的主机IP
[Unit]
Description=Etcd Server
After=network.target
After=network-online.target
Wants=network-online.target
Documentation=https://github.com/coreos
[Service]
Type=notify
WorkingDirectory=/var/lib/etcd/
EnvironmentFile=-/etc/etcd/etcd.conf
ExecStart=/usr/local/bin/etcd \
--name ${ETCD_NAME} \
--initial-advertise-peer-urls ${ETCD_INITIAL_ADVERTISE_PEER_URLS} \
--listen-peer-urls ${ETCD_LISTEN_PEER_URLS} \
--listen-client-urls ${ETCD_LISTEN_CLIENT_URLS},http://127.0.0.1:2379 \
--advertise-client-urls ${ETCD_ADVERTISE_CLIENT_URLS} \
--initial-cluster-token ${ETCD_INITIAL_CLUSTER_TOKEN} \
--initial-cluster infra1=http://192.168.73.61:2380,infra2=http://192.168.73.62:2380,infra3=http://192.168.73.63:2380 \
--initial-cluster-state new \
--data-dir=${ETCD_DATA_DIR}
Restart=on-failure
RestartSec=5
LimitNOFILE=65536
[Install]
WantedBy=multi-user.target
启动etcd及检查
1、启动:
systemctl daemon-reload
systemctl enable etcd
systemctl start etcd
systemctl status etcd
```
#### 进入node2,创建并运行run.sh,脚本内容和node1差不多(只修改了ETCD\_NAME和LOCAL\_IP)
```
#!/usr/bin/env bash
#节点名称
ETCD_NAME=node-2
#本机IP地址
LOCAL_IP=10.211.55.25
#ETCD存储目录
ETCD_DATA_DIR=/usr/local/etcd/data
#初始化名称
INITIAL_CLUSTER_TOKEN=cqh-test-cluster
#初始化群集列表
INITIAL_CLUSTER="node-1=http://10.211.55.2:2380,node-2=http://10.211.55.25:2380,node-3=http://10.211.55.26:2380"
#初始化状态
INITIAL_CLUSTER_STATE=new
#开始运行
etcd --name ${ETCD_NAME} --data-dir ${ETCD_DATA_DIR} \
--initial-advertise-peer-urls http://${LOCAL_IP}:2380 \
--listen-peer-urls http://${LOCAL_IP}:2380 \
--listen-client-urls http://${LOCAL_IP}:2379,http://127.0.0.1:2379 \
--advertise-client-urls http://${LOCAL_IP}:2379 \
--initial-cluster-token ${INITIAL_CLUSTER_TOKEN} \
--initial-cluster ${INITIAL_CLUSTER} \
--initial-cluster-state ${INITIAL_CLUSTER_STATE}
```
#### 进入node3,创建并运行run.sh
```
#!/usr/bin/env bash
#节点名称
ETCD_NAME=node-3
#本机IP地址
LOCAL_IP=10.211.55.26
#ETCD存储目录
ETCD_DATA_DIR=/usr/local/etcd/data
#初始化名称
INITIAL_CLUSTER_TOKEN=cqh-test-cluster
#初始化群集列表
INITIAL_CLUSTER="node-1=http://10.211.55.2:2380,node-2=http://10.211.55.25:2380,node-3=http://10.211.55.26:2380"
#初始化状态
INITIAL_CLUSTER_STATE=new
#开始运行
etcd --name ${ETCD_NAME} --data-dir ${ETCD_DATA_DIR} \
--initial-advertise-peer-urls http://${LOCAL_IP}:2380 \
--listen-peer-urls http://${LOCAL_IP}:2380 \
--listen-client-urls http://${LOCAL_IP}:2379,http://127.0.0.1:2379 \
--advertise-client-urls http://${LOCAL_IP}:2379 \
--initial-cluster-token ${INITIAL_CLUSTER_TOKEN} \
--initial-cluster ${INITIAL_CLUSTER} \
--initial-cluster-state ${INITIAL_CLUSTER_STATE}
```
我们看到3台都启动成功了\
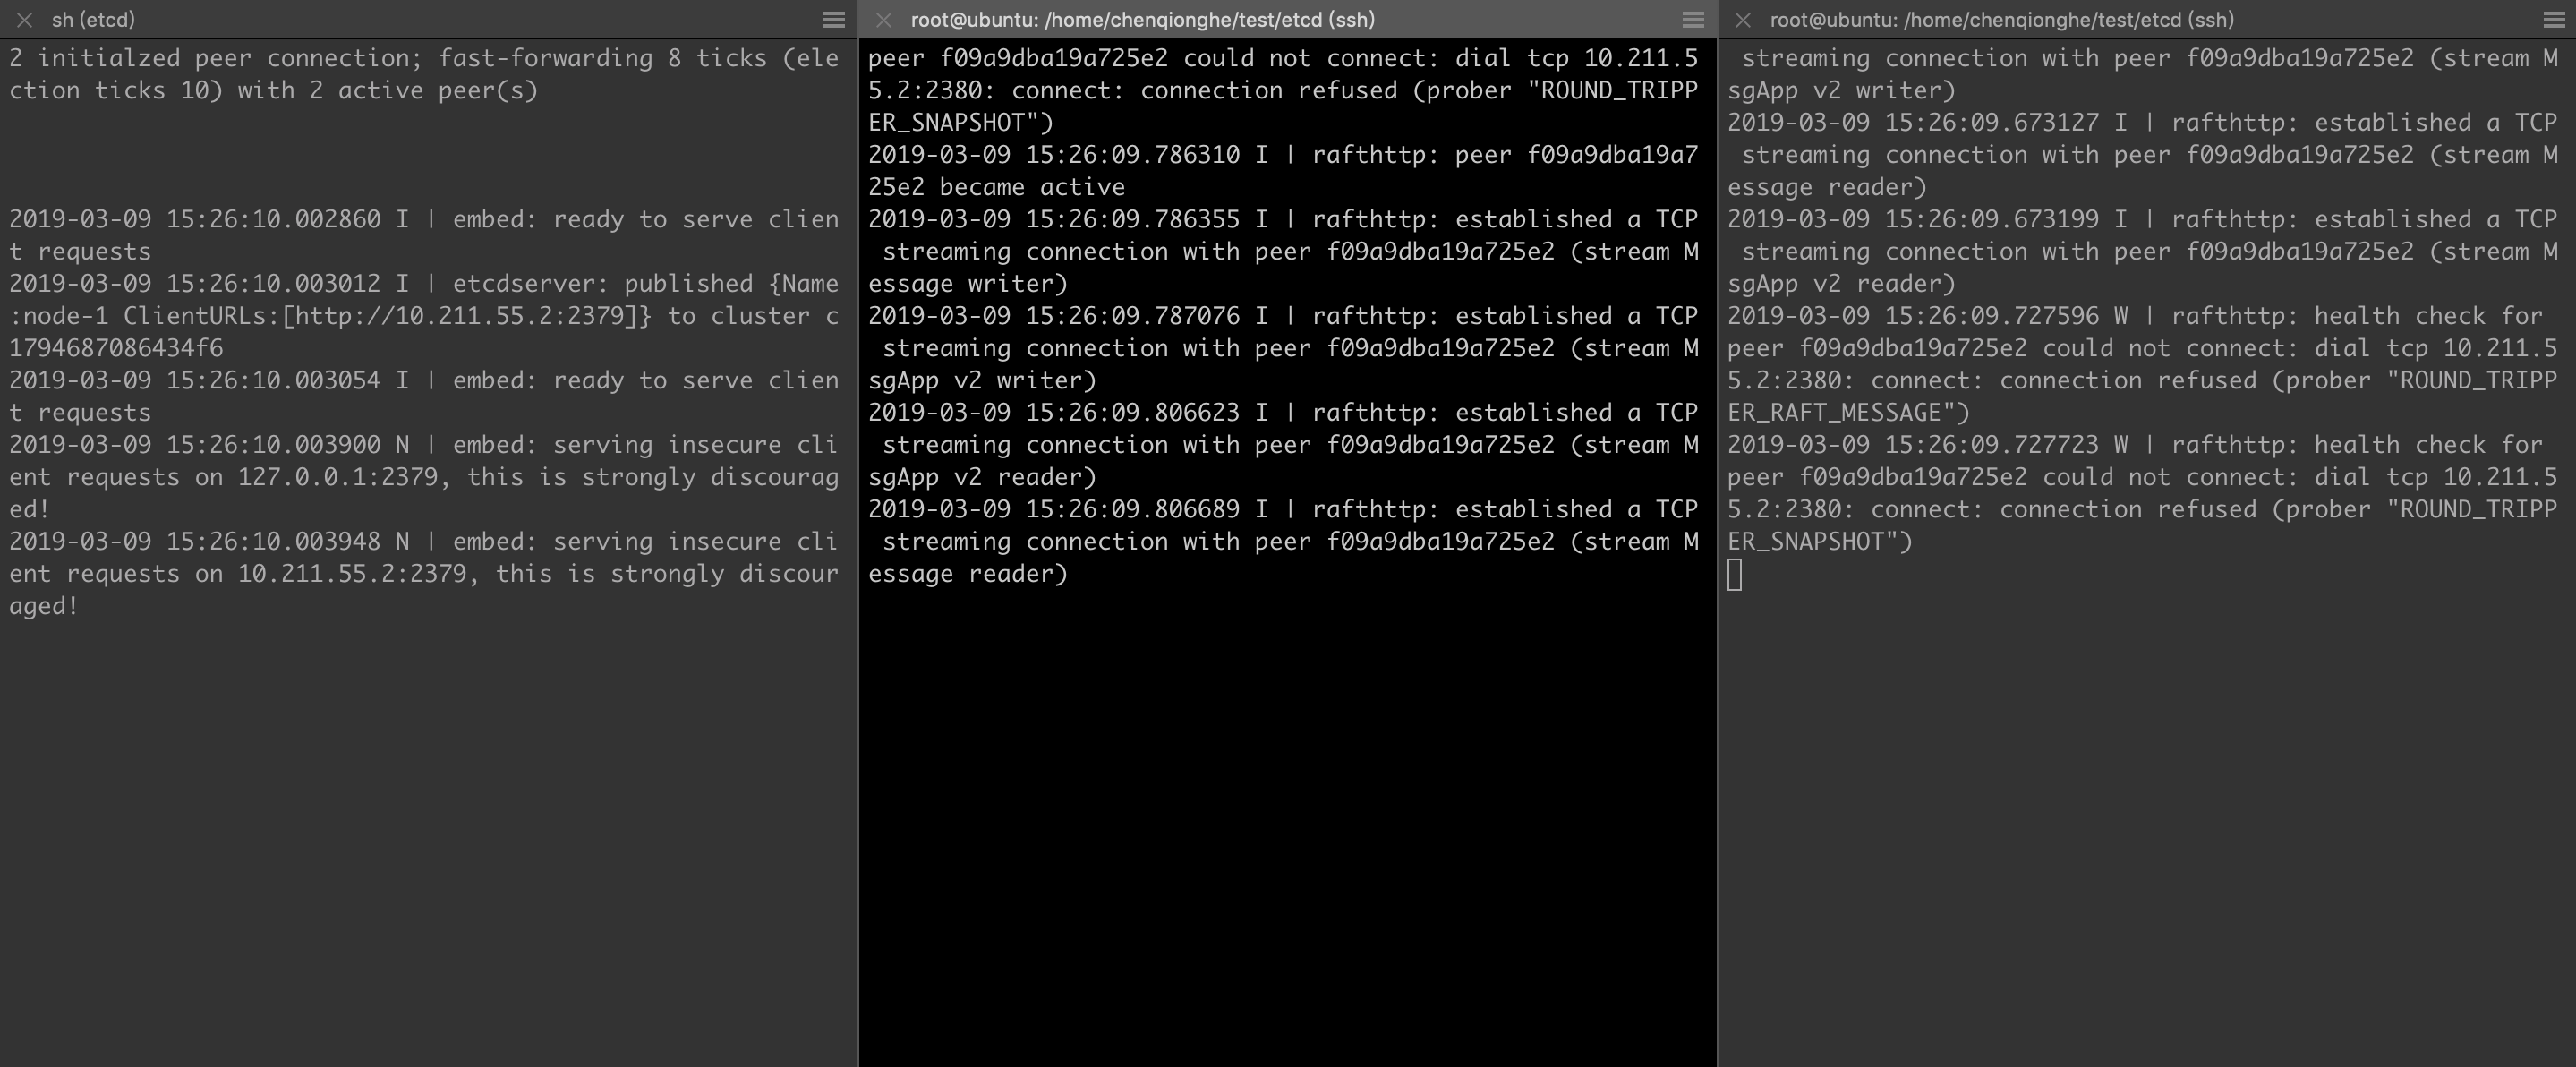
然后我们在node2上面执行操作
```
root@ubuntu:~# etcdctl member list
2033c1336b929ca7: name=node-3 peerURLs=http://10.211.55.26:2380 clientURLs=http://10.211.55.26:2379 isLeader=true
edc51d36208cfbcf: name=node-2 peerURLs=http://10.211.55.25:2380 clientURLs=http://10.211.55.25:2379 isLeader=false
f09a9dba19a725e2: name=node-1 peerURLs=http://10.211.55.2:2380 clientURLs=http://10.211.55.2:2379 isLeader=false
```
可以看到集群已经生效了,我们再来测试一下,在ndoe2上执行操作
```
etcdctl set /cqh muscle
```
看看node1和node3是否能保持数据一致

可以看到在node1和node3中都能能够正确的获取/cqh的值
## 四.监听功能watch演示
* etcdctl watch key\
观察一个值的变化,观察到变化后,打印值并watch退出\

* etcdctl watch key -f\
永久观察值的变化,观察到变化后,打印直到Ctrl+C退出\

* etcdctl exec-watch key -- sh -c 'pwd'\
监听到值有变化,就执行指定的命令(且不退出执行的可以是shell命令)\

## 五.使用rest api
* 创建键值
```
➜ ~ curl http://10.211.55.25:2379/v2/keys/cqh -XPUT -d value="陈琼和1"
{"action":"set","node":{"key":"/cqh","value":"陈琼和","modifiedIndex":14,"createdIndex":14},"prevNode":{"key":"/cqh","value":"陈琼和","modifiedIndex":13,"createdIndex":13}}
```
* 创建目录
```
➜ ~ curl http://10.211.55.25:2379/v2/keys/gym -XPUT -d dir=true
{"action":"set","node":{"key":"/gym","dir":true,"modifiedIndex":12,"createdIndex":12}}
```
* 获取键值
```
➜ ~ curl http://10.211.55.25:2379/v2/keys/cqh
{"action":"get","node":{"key":"/cqh","value":"陈琼和","modifiedIndex":14,"createdIndex":14}}
```
* 创建键值带ttl
```
➜ ~ curl http://10.211.55.25:2379/v2/keys/hero -XPUT -d value="超人" -d ttl=5
```
* 创建有序键值
```
curl http://10.211.55.25:2379/v2/keys/fitness -XPOST -d value="bench_press"
curl http://10.211.55.25:2379/v2/keys/fitness -XPOST -d value="dead_lift"
curl http://10.211.55.25:2379/v2/keys/fitness -XPOST -d value="deep_squat"
```
获取刚创建的fitness
```
curl http://10.211.55.25:2379/v2/keys/fitness
{"action":"create","node":{"key":"/fitness/00000000000000000020","value":"bench_press","modifiedIndex":20,"createdIndex":20}}
{"action":"create","node":{"key":"/fitness/00000000000000000021","value":"dead_lift","modifiedIndex":21,"createdIndex":21}}
{"action":"create","node":{"key":"/fitness/00000000000000000022","value":"deep_squat","modifiedIndex":22,"createdIndex":22}}
{"action":"get","node":{"key":"/fitness","dir":true,"nodes":[{"key":"/fitness/00000000000000000022","value":"deep_squat","modifiedIndex":22,"createdIndex":22},{"key":"/fitness/00000000000000000020","value":"bench_press","modifiedIndex":20,"createdIndex":20},{"key":"/fitness/00000000000000000021","value":"dead_lift","modifiedIndex":21,"createdIndex":21}],"modifiedIndex":20,"createdIndex":20}}
```
* 删除键
```
curl http://10.211.55.25:2379/v2/keys/cqh -XDELETE
```
* 列出所有集群成员
```
curl http://10.211.55.25:2379/v2/members
```
* 统计信息-查看leader
```
curl http://10.211.55.25:2379/v2/stats/leader
```
* 节点自身信息
```
curl http://10.211.55.26:2379/v2/stats/self
```
* 查看集群运行状态
```
curl http://10.211.55.26:2379/v2/stats/store
```
## 六.搭建WEB界面并使用
这里分别演示搭建etcd-browser和etcdkeeper,两者功能大同小异,不同的是etcdkeeper支持v3的api
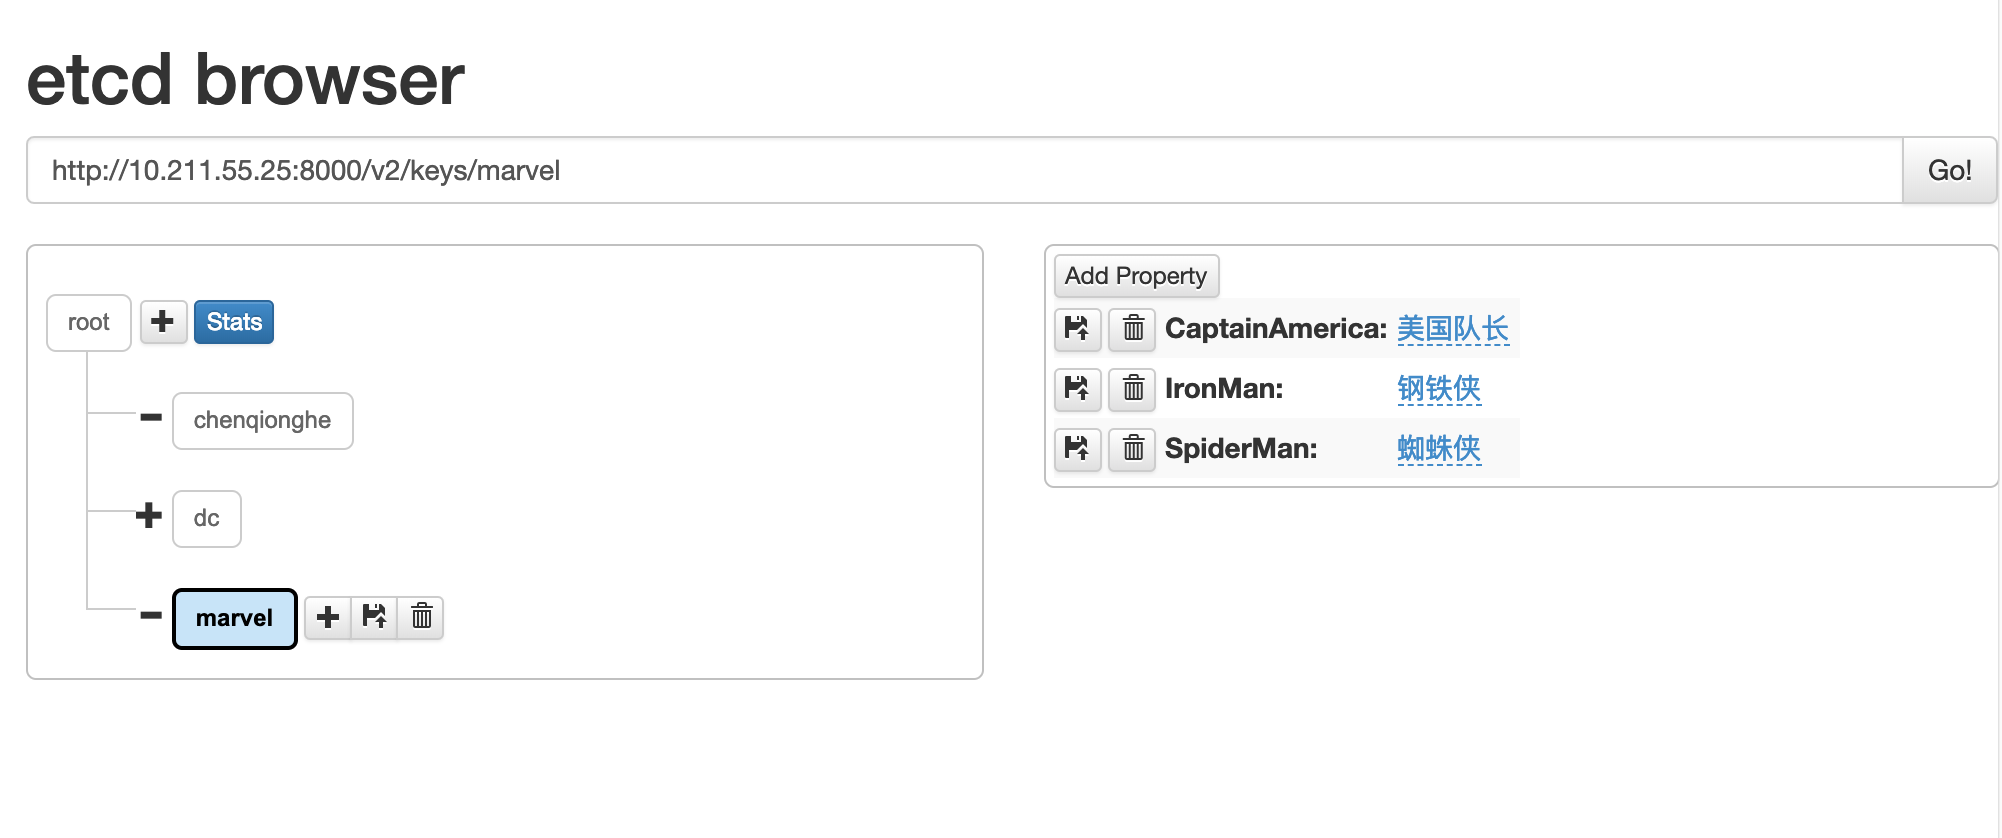
### 1.搭建etcd-browser
```
docker run --rm -d --name etcd-browser \
-p 8000:8000 \
--env ETCD_HOST=10.211.55.25 \
--env ETCD_PORT=2379 \
buddho/etcd-browser
```
运行后访问
看到如下界面,可以看到上面添加的所有数据,这里我使用界面添加了漫威和DC的英雄\
### 2.搭建etcdkeeper
```
docker run -it -d --name etcdkeeper \
-p 8080:8080 \
deltaprojects/etcdkeeper
```
访问
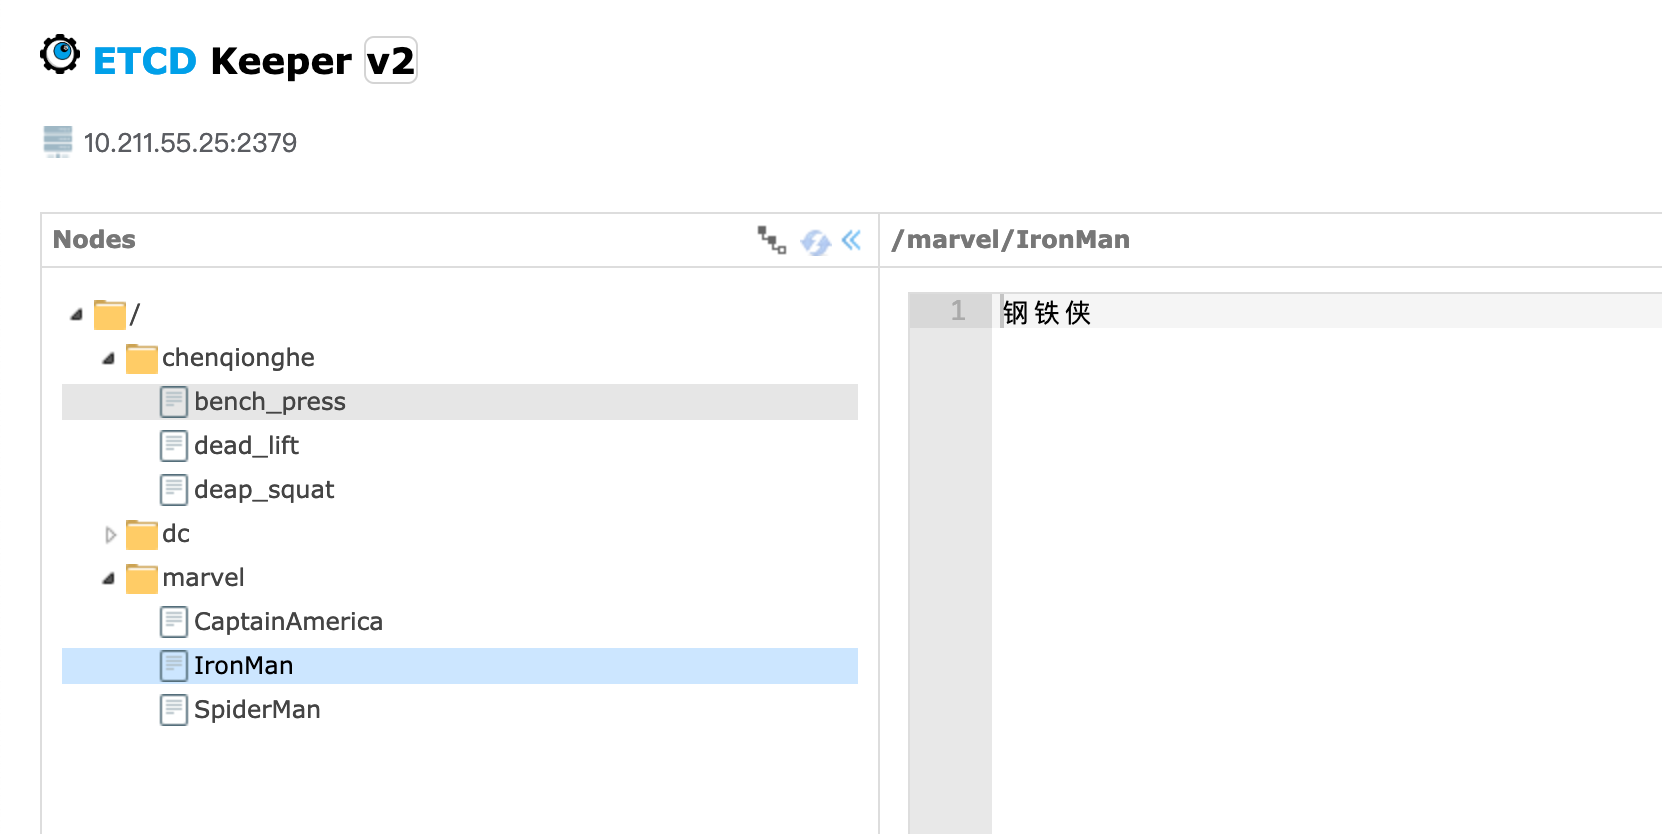
到这里,etcd的单机版搭建、集群版、客户端使用、rest api、web管理界面等功能都介绍了,你还在等什么,赶紧high起来
## **Kubernetes中的Etcd**
自从2014年成为Kubernetes的一部分以来,Etcd社区呈现指数级的增长。CoreOS、谷歌、Redhat、IBM、思科、华为等等均是Etcd的贡献成员。其中AWS、谷歌云平台和Azure等大型云提供商成功在生产环境中使用了Etcd。
Etcd在Kubernetes中的工作是为分布式系统安全存储关键数据。它最著名的是Kubernetes的主数据存储,用于存储配置数据、状态和元数据。由于Kubernetes通常运行在几台机器的集群上,因此它是一个分布式系统,需要Etcd这样的分布式数据存储。
Etcd使得跨集群存储数据和监控更改变得更加容易,它允许来自Kubernetes集群的任何节点读取和写入数据。Kubernetes使用Etcd的watch功能来监控系统实际(actual)状态或期望(desired)状态的变化。如果这两个状态不同,Kubernetes会做出一些改变来调和这两个状态。kubectl命令的每次读取都从Etcd存储的数据中检索,所做的任何更改(kubectl apply)都会在Etcd中创建或更新条目,每次崩溃都会触发etcd中值的修改。
## 总结
etcd 默认只保存 1000 个历史事件,所以不适合有大量更新操作的场景,这样会导致数据的丢失。 etcd 典型的应用场景是配置管理和服务发现,这些场景都是读多写少的。
相比于 zookeeper,etcd 使用起来要简单很多。不过要实现真正的服务发现功能,etcd 还需要和其他工具(比如 registrator、confd 等)一起使用来实现服务的自动注册和更新
## 更多资料
关于如何在etcd中查看kubernetes的数据,请参考使用[etcdctl访问kuberentes数据](https://jimmysong.io/kubernetes-handbook/guide/using-etcdctl-to-access-kubernetes-data.html)
{% embed url="" %}
用ansible搭建etcd